How to make a hull bottom pickup by Paul Pachmayer
What you need;
3 foot piece of 5/32" K&S aluminum tube.
Brass 5/32" K&S Tubing.
Medium silicon fuel line.
5 minute epoxy Salt
First thing to do is locate where the water pickup hole needs to be drilled. In general I use the same measurement on all my monos that use through hull pickups, 3/4" forward of the transom and 3/8" from the keel. Mark this location with a pencil.
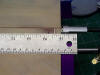
Now you need to drill the hole in the transom. Use a 5/32nd inch bit, start by drilling straight into the hull.
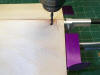
On my monos I always put a piece of 3/32 or 1/8" balsa doubler on the inside of the hull for extra support. If your working on a plastic boat or a wood one that has only the sheeting in this area, glue a piece of 1/8" plywood about 1 inch square over the hole you just drilled. It's a bit easier to glue the piece in after you drill the hole because you can see exactly where the plywood needs to go. Now drill through the plywood doubler.
Once you've drilled through the hull you need taper the hole inside and out. To do that you keep the drill running and tilt the drill toward the front of the boat while making sure you keep the drill bit parallel to the keel of the boat. The straighter you keep the bit the easier it is to finish off.
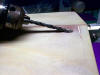
Take your time doing this step so that you don't scar the hull. I have put some nice gouges in the bottoms of hulls by not paying attention to how close the drill chuck was to the hull. Believe me, it happens quickly so stop when the chuck is about a 1/16th or so away from the hull. The finished hole will look something like this.
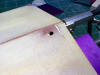
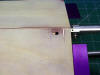
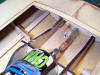
Now that the hole is drilled you need to take the 5/32" brass tube and bend it in a tight U shape. The easiest way to do this (if you don't have a tubing bender) is to anneal the tube so it bends nicely. Don't be to concerned about the tubing loosing some of it's shape/roundness, you can correct a small kink by gently squeezing it with pliers. The finished curved tube should look like this.
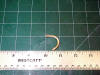
I bent that tube using my fingers only, just a little at a time until I was satisfied with the shape.
Now take the U shaped tube and slide it into the hole. Make any additional bends to the tube so it fits nicely in the hole. The tube should exit the hull like this. Notice how the tubing lays nice and flat against the bottom of the hull
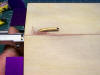
While holding the tube in position on the outside check the tubing inside the hull and make sure it isn't in the way of any fastening hardware you'll need to get at.
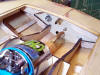
Once your satisfied with the tubing's position make a mark on the tubing just where the end of the hole is and trim on the mark. Notice I marked where the hole ends on the hull with a pencil, this makes marking the tube a bit easier.
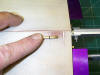
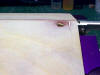
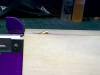
Now that the tubing is trimmed glue it in position from the inside and outside with thin CA. After the CA sets mix up some 5 minute epoxy and spread it around the tube inside the hull. Once you have the inside epoxied take a small amount of the epoxy and spread it on the outside of the hull around the tube, this will fill any small gaps or chips in the wood around the tube. Remember to work quickly on the outside of the hull and flip the boat over as soon as possible because the larger amount of epoxy on the inside will be moving a bit.
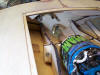
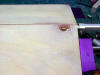
Once the epoxy has had a chance to set you'll need to finish off the pickup tube on the outside of the hull. If your careful you can use a Dremel and cutoff wheel to remove most of the excess tubing, if not just sand the tubing down with a sanding block until its flush with the hulls bottom. Your end result should look like this.
The last thing I do is make a "thermostat" for the cooling system. Just like in a car you don't want the water going through the system so fast that it doesn't have a chance to remove heat. What I do is take a small piece of the 5/32 brass tubing and a small piece of 1/8" tubing and ca the smaller tube inside the larger one. I cut the exit fuel tubing about half way down it's length and install the little thermostat in. Restricting the water flow this way gives the water a bit more time in the system to remove heat. This seems to work pretty well in most applications.